Raised Garden Adventure Part 1 -- READ THE DIRECTIONS!
Sure.
This will be a simple post. But this is not a simple project.
My recommendations follow:
1. Do your research and think about what will work best for you.
You can spend as much or as little as you want. You have options for materials and such. Many folks use recyclables and build their own wooden beds. I ordered a coated corrugated metal modular raised bed. Okay, who am I kidding? I ordered two that offered multiple configurations and extra panels & corners. [It was my Christmas present to me. I like options.]
 |
| One of three boxes. It wasn't that heavy, but it was nice of the UPS guy to offer to put them in the garage and not drop them on the front porch. |
2. Read the directions.
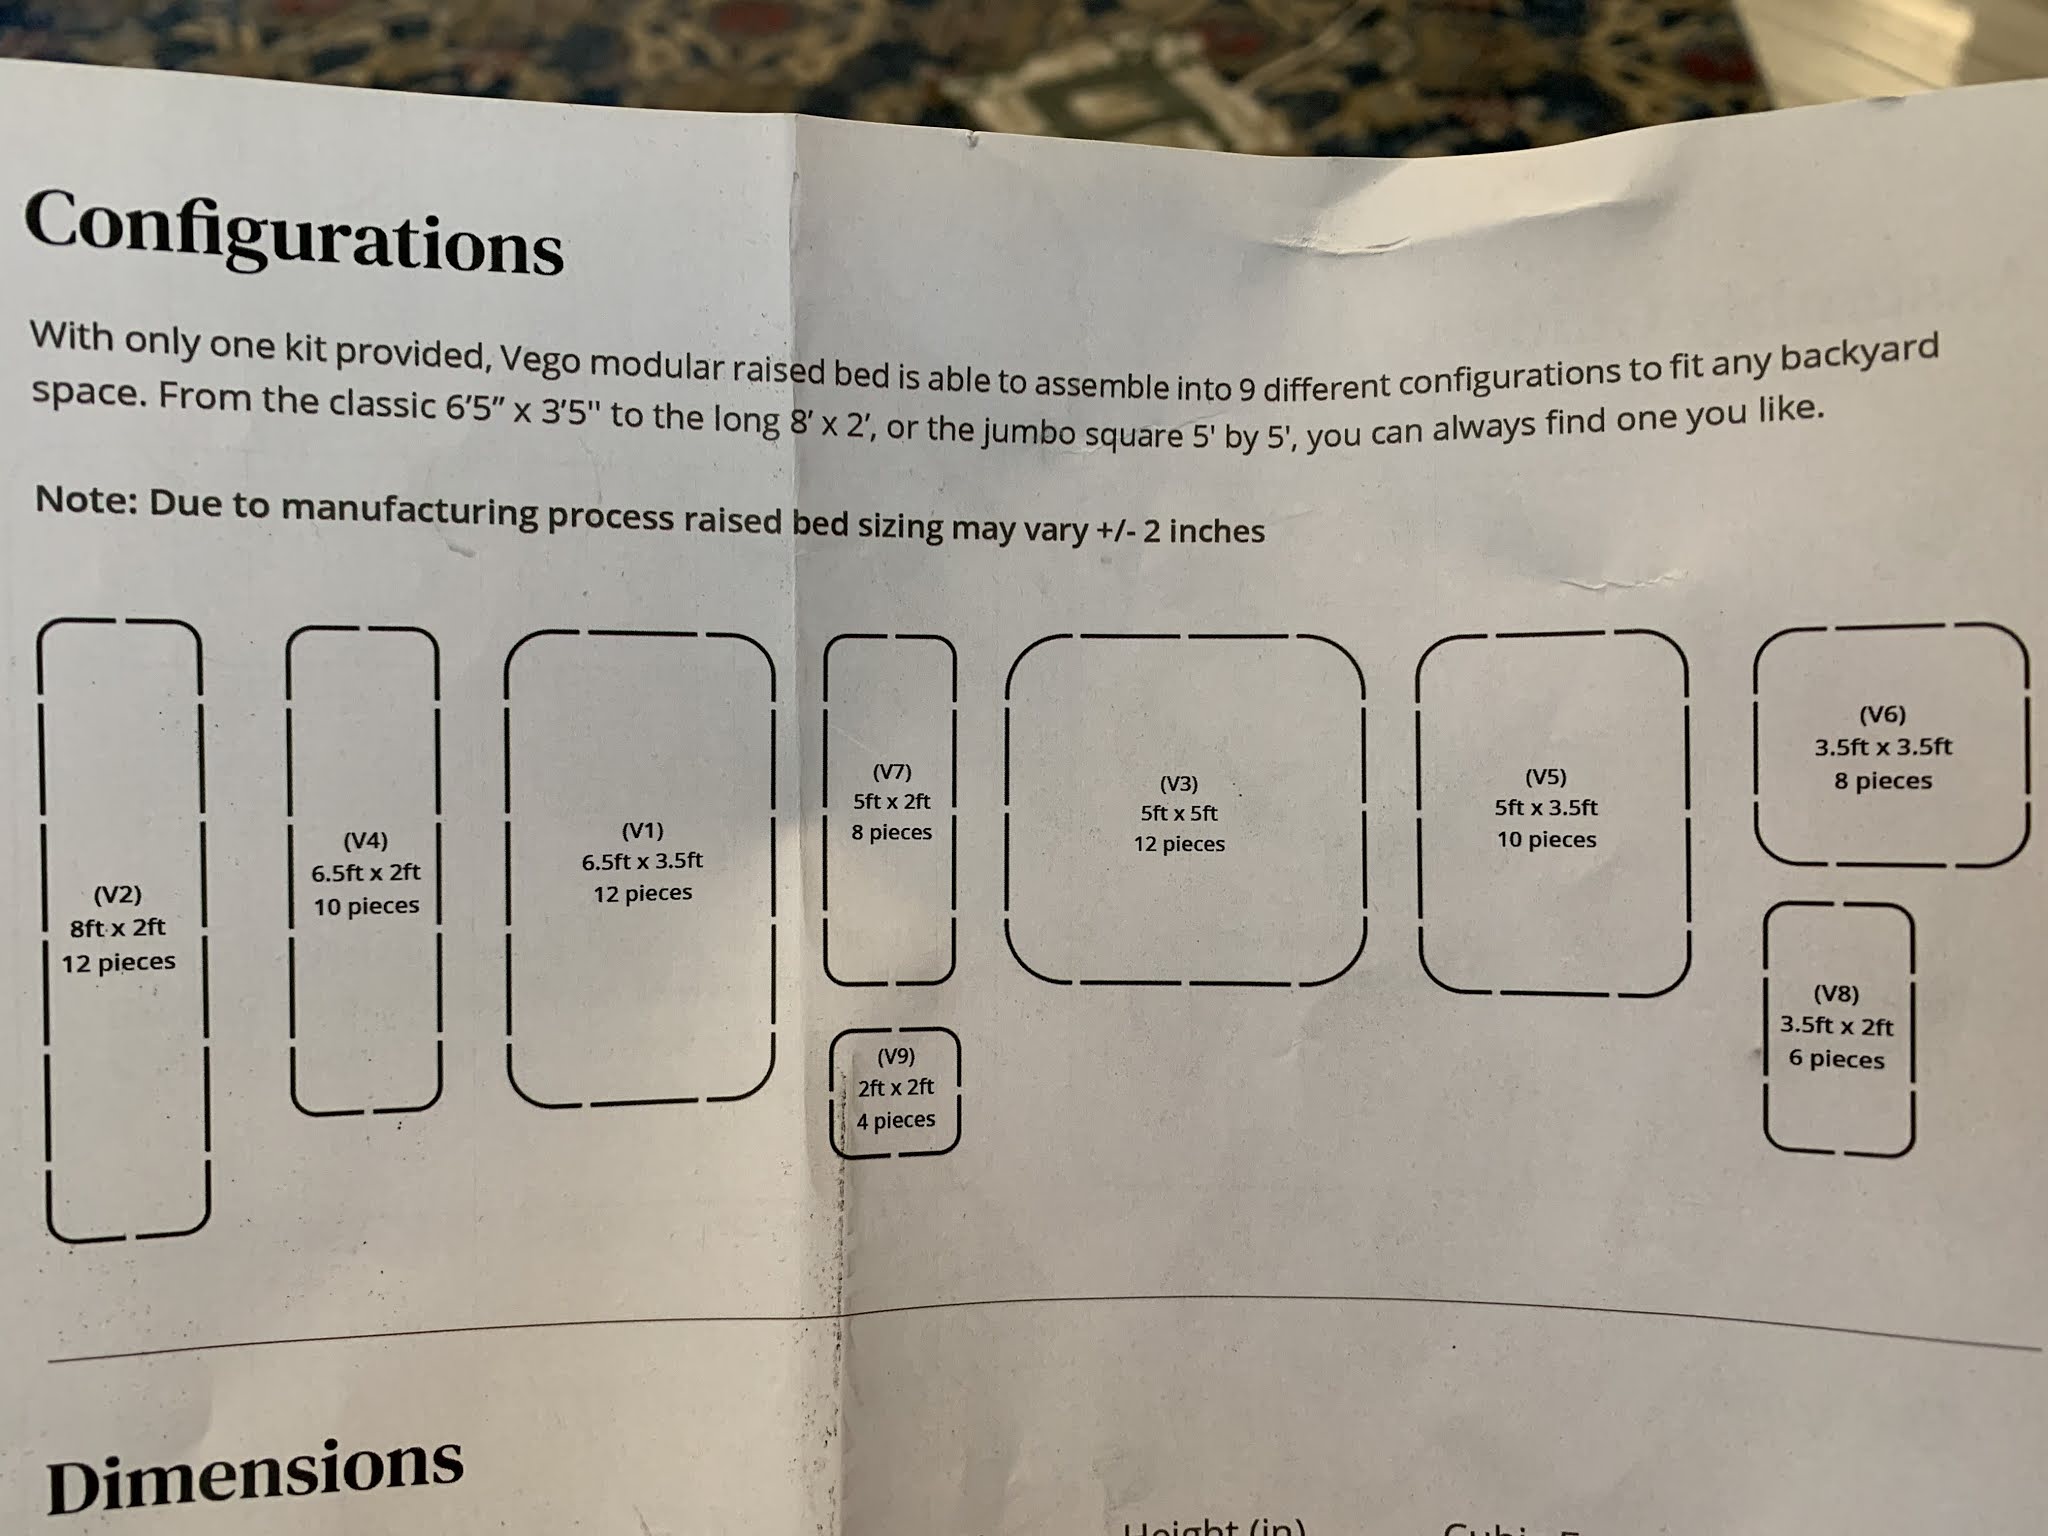
Make sure all the pieces are there and decide what size bed you want.
 |
| This company offers many options. I ordered the 17 inch deep beds. |
 |
| In the regular boxes you get exactly the number of bolts, washers, and nuts that you need. If you order extra panels you might end up with more than you need. Do not panic if there are leftover fasteners. |
 |
| I have no idea why I did this other than that I saw a photo somewhere like this. It did let me know what direction I was going in. |
3. Re-read the directions.
If they tell you to remove the film from the panels, remove the film from the panels. Even if it doesn't look like there is plastic film on the panels you need to scratch with your fingernail and you will find the film. And if you have difficulty getting the film to the place where you can remove it, keep trying. It is easier to remove BEFORE you put the bed together than after. Seriously...even if it appears there is no film on the panel, keep trying. Trust me.
3. Re-read the directions.
The directions mention an electric drill/screwdriver. If you don't have an electric drill with a screwdriver attachment, get one. Trust me.
Re-read the directions.
Make sure you know what size bed you want as you do not want to build/deconstruct/rebuild.
Re-read the directions.
You might want to wear some gloves. The edges aren't really sharp, but can give you a little slice since your skin is tender from all the pandemic washing. If you think you don't want to wear gloves, keep some bandaids close by.
Re-read the directions.
Do put the safety rubber edging around the top of the bed.
Re-read the directions.
Dog and cat observers are not essential, but well-trained pets will be able to cast a critical eye on your work and some might even be able to call 911 in the event your non-glove-wearing cuts bleed excessively
or your late film removal induces vertigo and they find you tipped over in the grass.
30 panels, 3 beds, 180 nuts, bolts, washers, 51 feet of safety rubber edging, untold hours, 3 raised beds. One is 3.5x3.5. One is 3.5x5. One is 3.5x6.5.
Ah, now that your beds are made you can sleep in them while you decide on placement and fill! [For me that will require about 3 cubic yards of material to fill. Don't ask what I'm planning. Fortunately I've friends who will be helping. I'll take photos and post as we go if you are interested. Until then, here is a shot of the "mostly native nursery."
 |
| Wildflowers and such...many experiments in propagation. |
 |
| Bulbs and other plants. I just needed the bulbs to be planted. Much of this will be shared with friends and perhaps some plant sales for naturalist groups. So much depends on "opening up." It may be next year before we can see each other person to person. |
Happy gardening!
NOTES:
* My sweet Zelda sometimes uses the flowerbed as her personal toilet. She is a dog after all. I don't want to grow veggies where she can contaminate the soil.


Comments
Post a Comment